Showing posts with label casserole. Show all posts

Wednesday, July 3, 2024

Tex-Mex Chicken Thighs and Rice


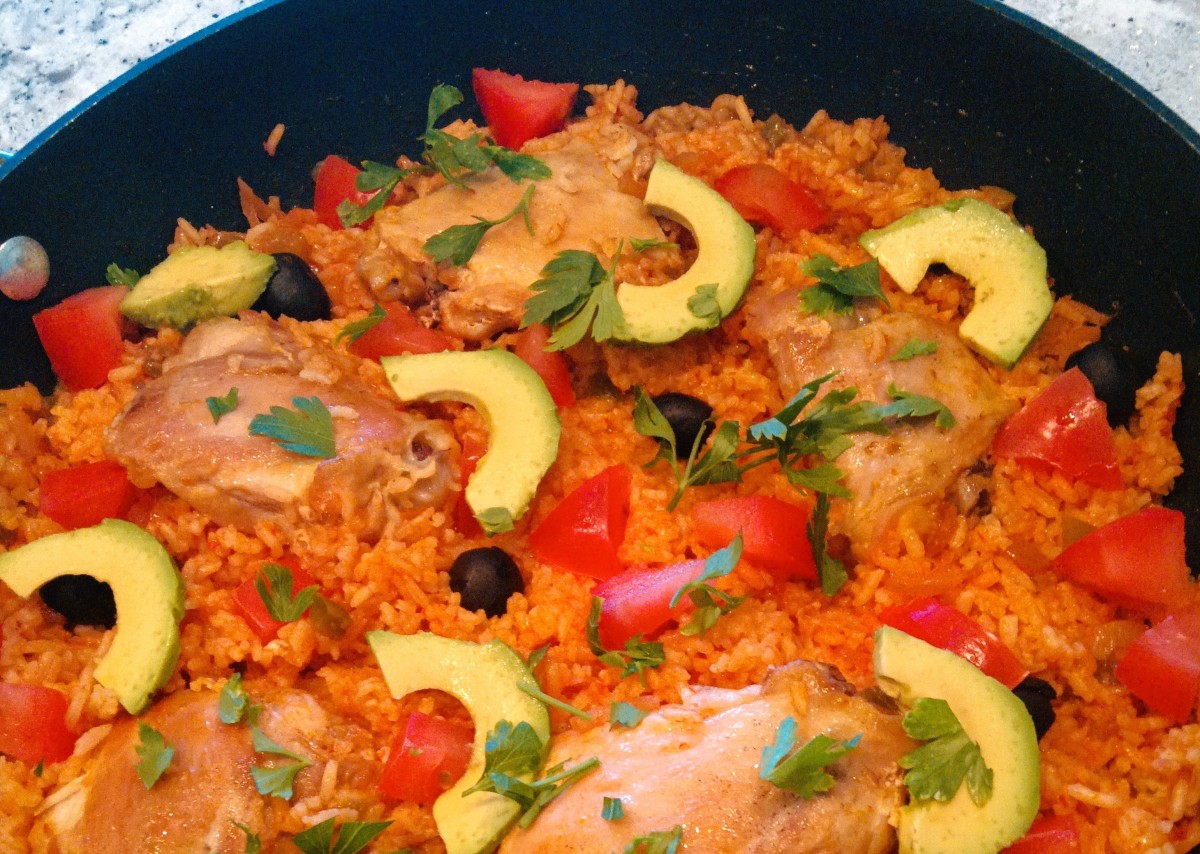
Tex-Mex chicken thighs with rice

It Began With Half an Avocado

In my corner of the world, avocados are ridiculously, outrageously expensive. And, if you've been reading my articles for a while, you know that thrifty is my middle name. Waste nothing ... not even half of an avocado.

I was faced with that dilemma a few days ago. Half an avocado in need of a good home/recipe. Salad is the obvious (easy) choice, but I don't do easy. Here's what I came up with.

Tex-Mex Chicken Thighs and Rice

Ingredients

  • 6 skinless chicken thighs, bone-in
  • 1/2 teaspoon salt
  • 1/4 teaspoon black pepper
  • 1 tablespoon olive oil
  • 2 cloves garlic, chopped
  • 1/2 onion, diced (about 1/2 cup)
  • 1 1/3 cups uncooked long-grain rice
  • 1 cup salsa (mild or medium, depending on how spicy you like it)
  • 2 cups chicken broth
  • 1 teaspoon ground cumin
  • 1/4 cup black olives, optional
  • 1/4 cup fresh cilantro, chopped
  • sour cream and avocado to garnish (optional)

Instructions

  1. Season the chicken with salt and pepper. Heat the oil in a large, deep cast iron skillet/or pan (over 30 cm or 12-inches) over medium-high heat. Add the chicken and as soon as it begins to sizzle, turn the heat down to low and cook uncovered. We're going to cook these thighs low and slow, creating browning which equals flavor. After 10 minutes the thighs should be golden on one side.
  2. Increase the heat to medium-high once again. Turn each thigh and when you hear the sizzle, reduce the heat to low once again. Continue to cook until the 2nd side of the chicken is golden. Transfer the chicken to a warm plate.
  3. Add the onion to the pan and increase the heat to medium; fry for about 3 minutes or until the onion is translucent. Next, add the garlic to the pan; stir and cook for 30 seconds. Stir in the rice, salsa, chicken broth, cumin, and olives if using.
  4. Place chicken thighs on top of the rice. Bring to a boil; rotate the chicken in the salsa sauce to coat. Reduce the heat to low and cover with a lid. Cook for 20 minutes or until the rice is tender and the liquid is absorbed. Add an extra 1/4 cup of water only if needed (if the rice hasn't cooked fully).
  5. Garnish with cilantro, sour cream, and avocado if desired.

Tuesday, May 21, 2024

An Italian Twist to Chicken and Rice


Ingredients

  • 4 boneless, skinless chicken thighs
  • 1/4 teaspoon Kosher salt
  • 1/4 teaspoon freshly ground black pepper
  • 2 teaspoons olive oil
  • 1 cup minced white or yellow onion
  • 1 cup finely diced red bell pepper
  • 1/3 cup oil-packed sundried tomatoes, diced
  • 4 boneless, skinless chicken thighs
  • 1 1/2 cups orzo (rice-shaped wheat pasta)
  • 1 15-ounce can tomatoes, crushed
  • 1 3/4 cups chicken broth
  • 1/4 cup basil pesto
  • 1/2 of a small lemon
  • Flat leaf parsley for garnish (optional)

Instructions

  1. Heat the olive oil in a large saute pan over medium-high heat until shimmering. Season the chicken thighs with salt and pepper. Carefully add the chicken to the pan (there will be some sputtering) and lower the heat to medium-low.
  2. Slowly cook the thighs until golden brown on one side, about 5 minutes. Flip the chicken and cook on the other side for an additional 5 minutes or so until golden. Remove from the pan and set aside. (Note, the chicken will not be done; it will continue to cook in the pan with the other ingredients in a few minutes.)
Chicken is golden but not completely cooked. Waiting to go back into the pan

3. In the same pan add the onion, bell pepper, and oil-packed sundried tomato. Cook over medium heat, stirring frequently, until the vegetables have softened.

4. Add the orzo to the pan and stir to coat with the oil from the tomatoes and cooking fat from the chicken. Cook for several minutes, stirring often, to toast the orzo.

Orzo is golden

5. Increase the heat to high; add the tomatoes, broth, and pesto and stir. Return the chicken to the pan and nestle it in with the orzo and broth. Reduce the heat to low; cover and simmer until the orzo is done, about 15–20 minutes.

6. Remove the lid; stir the orzo and take a spoonful to be sure that it is cooked. Taste for seasoning and adjust as needed. A squeeze of lemon juice will make the flavors pop and might be the only other seasoning you need. Garnish with parsley and serve with a tossed green salad.

Saturday, January 27, 2024

French Onion Chicken and Pasta


The Weather Outside Is Frightful

I live in the United States—you'll find me in the upper left-hand corner of the map, the Pacific Northwest, specifically Washington. Washington, the "Evergreen State." Evergreen because, as you've heard, it rains here ... a lot.

As I write it's the dead of winter. The sun goes down at 4:00 p.m. and sunrise isn't until about 8:00 in the morning. I'm beginning to forget what the sun looks like, and we are all desperately in need of comfort food. Soups and stews are on the menu rotation along with this dish I created for dinner last night—French onion chicken and pasta.


Ingredients

  • 4 skinless, bone-in chicken thighs, medium size
  • 2 tablespoons olive oil
  • 1 tablespoon unsalted butter
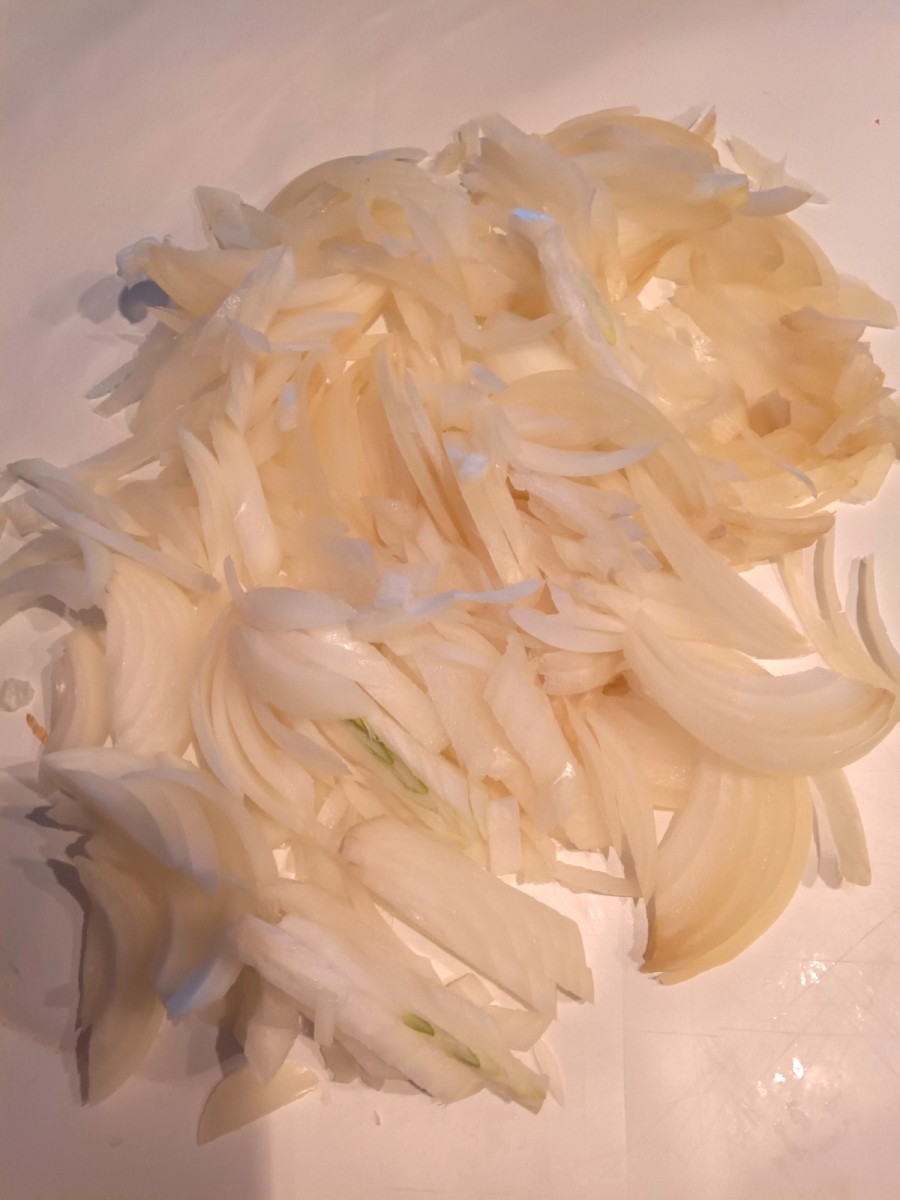
  • 3 cups yellow onions, sliced vertically (see note)
  • 1/4 cup dry sherry
  • 1 tablespoon all-purpose flour
  • 4 cups beef stock
  • 8 ounces dry pasta, orecchiette or other shell-shaped pasta
  • 1/2 cup Gruyere cheese, shredded, for garnish

Instructions

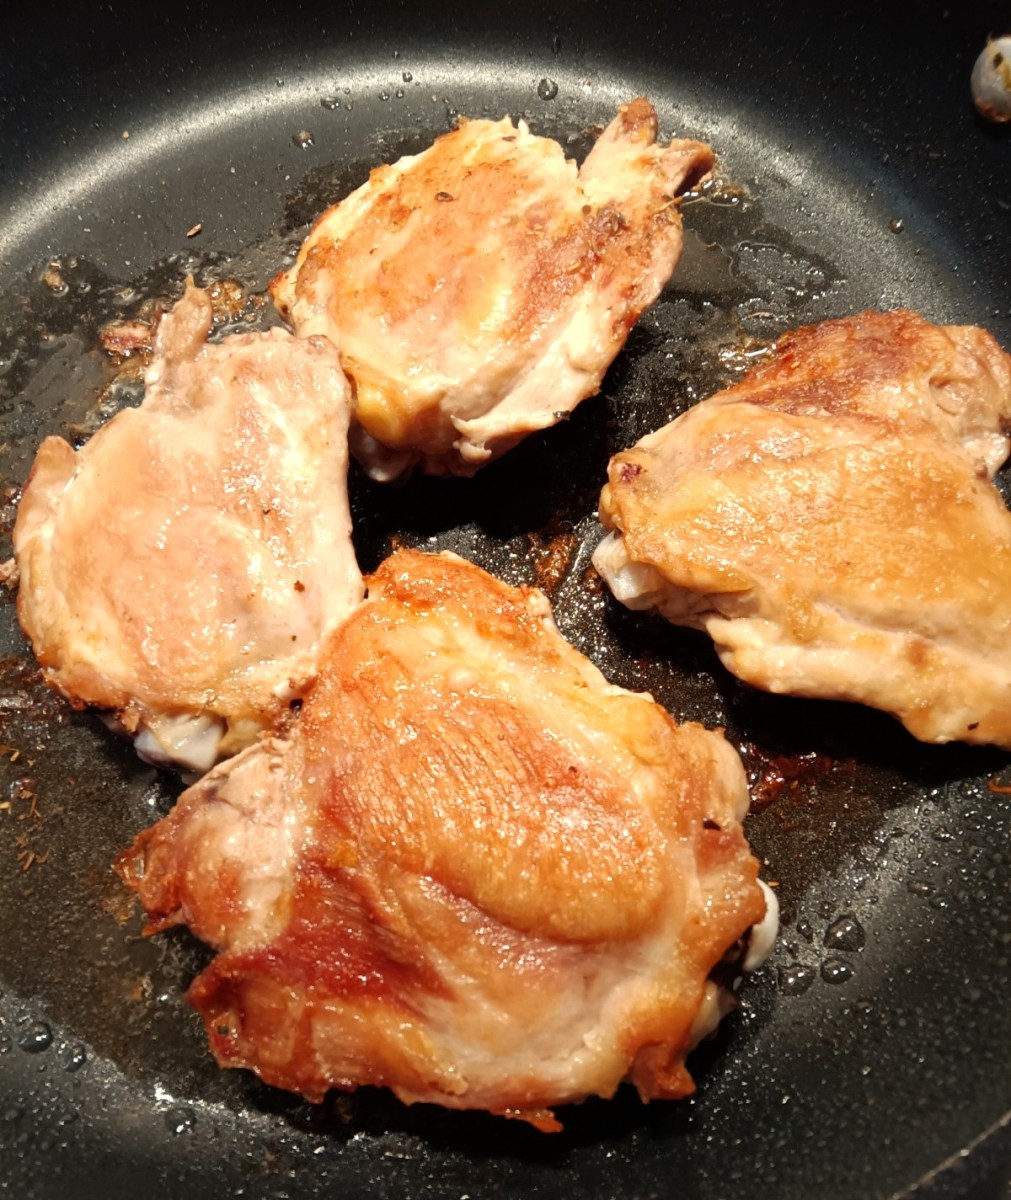
  1. Heat olive oil in a large saute pan over medium heat. Pat the chicken thighs dry with paper towels and then season both sides with salt and pepper. Reduce the heat to low and slowly saute the thighs until richly browned on one side, about 10 minutes.
  2. Flip the chicken thighs over and cook on the other side until brown, about 10 minutes more. This low and slow cooking makes the thighs meltingly fork tender and creates fond in the bottom of the pan (I'll explain that in Step 3). Remove the chicken from the pan and set aside.
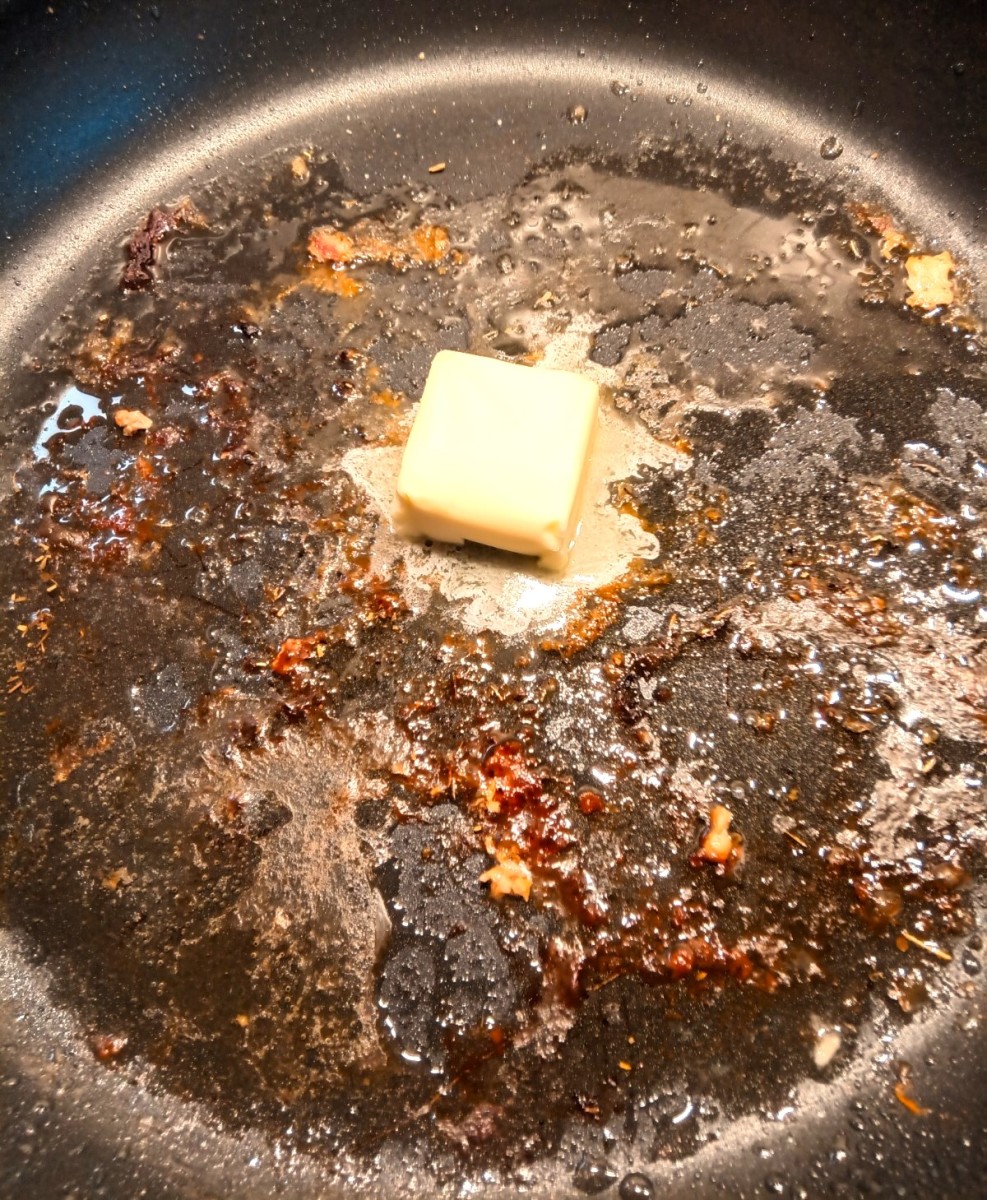
  3. The bottom of the pan contains yummy bits from cooking that chicken; this is called "fond" and is an important part of the success of this dish. Fond equals flavor.
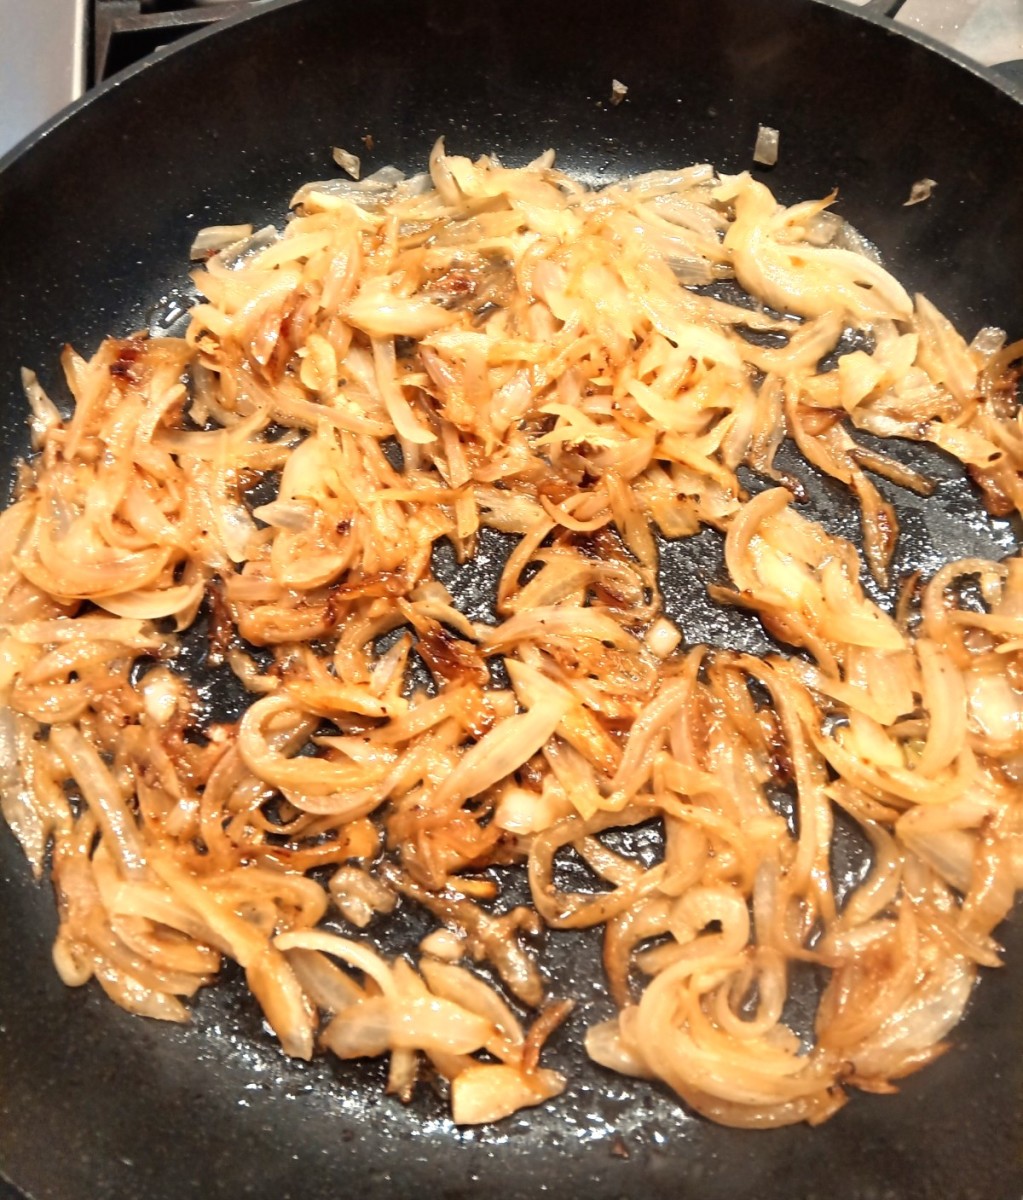
  4. Increase the heat to medium; add the butter to the pan and once it melts add all of the onions. Yes, it looks like a lot of onions, but keep in mind that onions are about 89 percent water. As soon as you hear the onions begin to sizzle, turn the heat back down to low. Cook the onions, stirring occasionally, until they are a luscious golden brown. This will take at least 30 minutes. You might be tempted to increase the heat to hurry the process; please don't. If cooked with higher heat the onions will burn and become bitter tasting. Your patience will be rewarded. (By the way, slicing the onions pole to pole means that you cut them from stem end to bottom, not horizontally.)
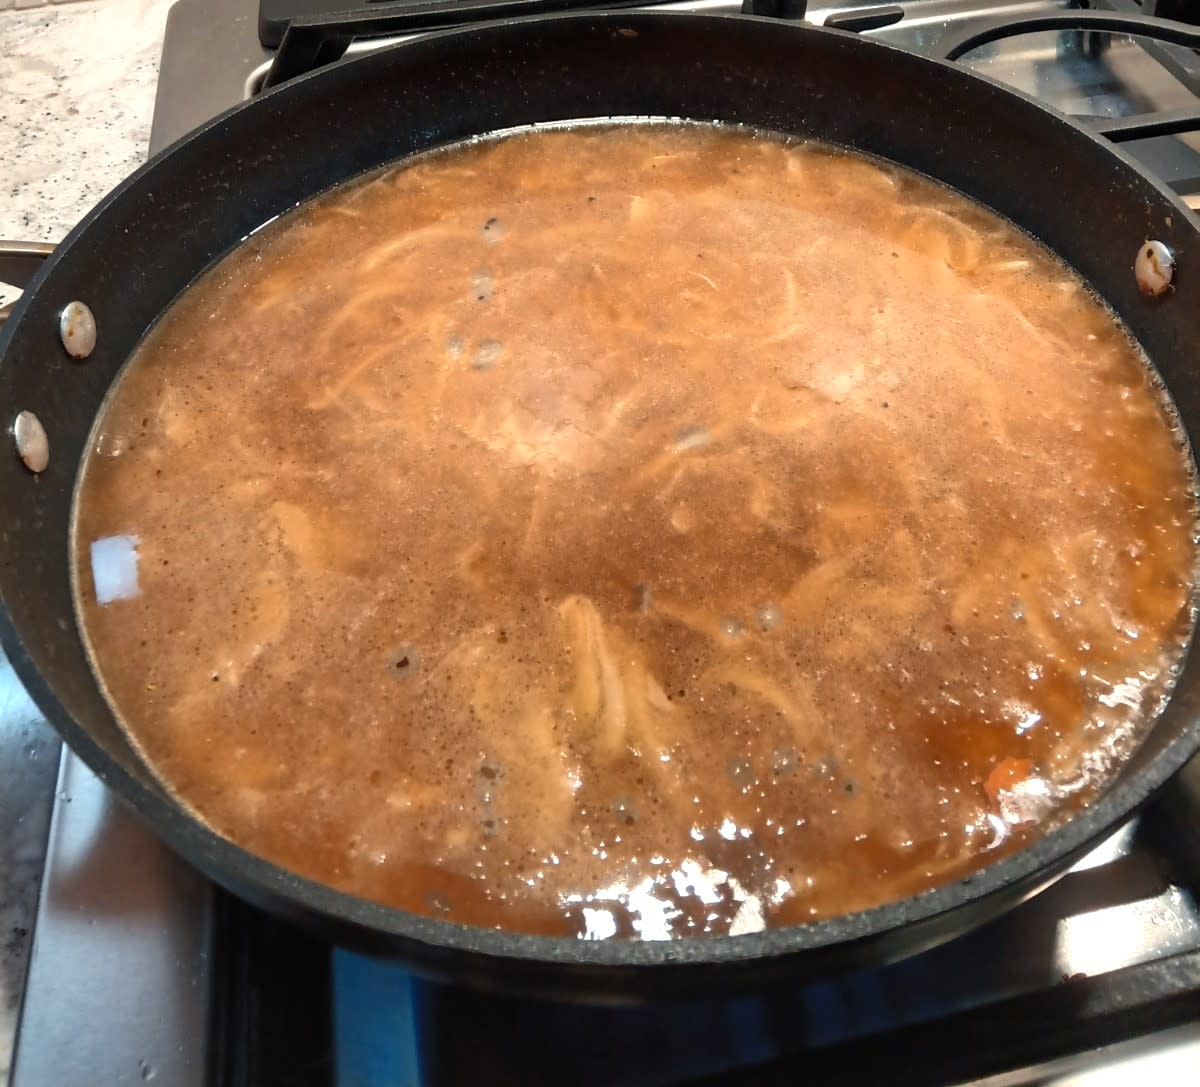
  5. When the onions are golden increase the heat to high. Add the sherry and stir until the sherry evaporates. Add the flour and stir to coat the onions. Add the broth and stir to mix everything together.
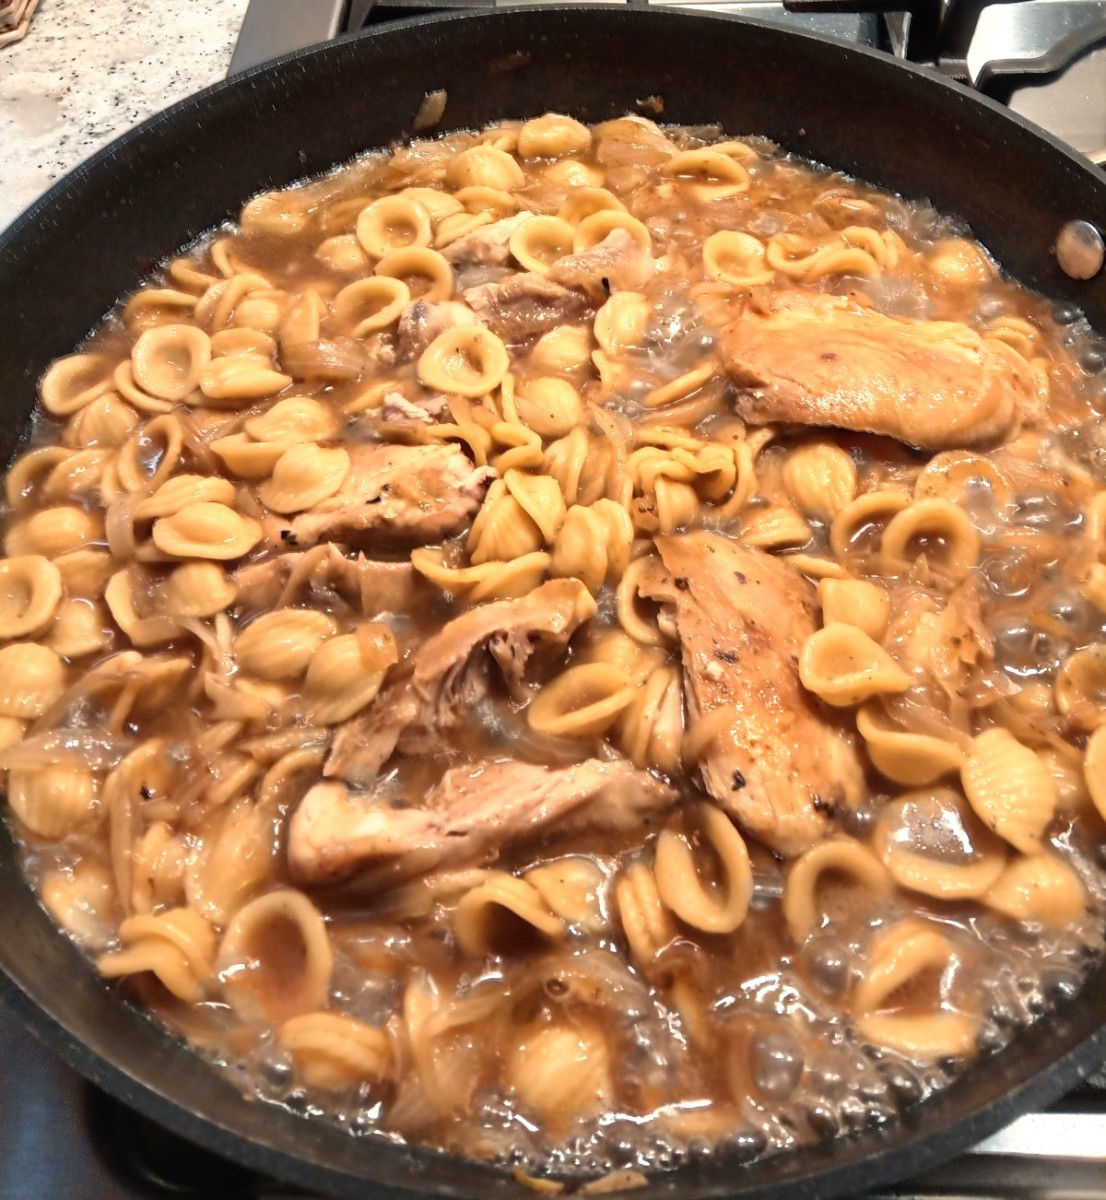
  6. When the mixture is boiling add the pasta all at once. Stir to combine and then turn the heat down so that the mixture just barely simmers. Cook, stirring occasionally, until the pasta is tender (the orecchiette I used took about 15 minutes to cook.) Several things happen in this step; the pasta absorbs the flavors in the broth, the broth reduces slightly, and the pasta releases its starch into the broth to help thicken and create a sauce.
  7. While the pasta is cooking, remove the cooked chicken meat from the bone. You can omit this step if you wish, but deboning the chicken makes this dish a little easier to eat. When the pasta is tender, nestle the cooked chicken back into the pan and toss to coat with the sauce. Serve, and garnish with cheese. I served this meal with sauteed kale.

Photo Guide

Richly browned chicken thighs
Source: Linda Lum
Butter and fond in the saute pan
Source: Linda Lum
3 cups of onions sliced pole to pole
Source: Linda Lum
Golden brown cooked onions
Source: Linda Lum
Beef broth added to the pan
Source: Linda Lum

Pasta is cooked and the chicken is nestled back into the pan, ready to serve

Monday, March 6, 2023

Tomato Macaroni and Cheese


This is not the prettiest plate of food I've ever prepared, but it certainly delivered on flavor. In my quest to always pack more veggies into every meal, I've attacked even our beloved macaroni and cheese. By under-cooking the pasta, draining, and then adding a can of diced tomatoes (juice and all) to the pot, the pasta not only finishes cooking but it gains a ton of flavor from the tomatoes. Here's the recipe.

Ingredients
  • 3 cups dry (uncooked) elbow macaroni
  • 1 14-ounce can petite diced canned tomatoes
  • 1/4 cup butter
  • 1/4 cup all-purpose flour
  • 2 1/2 cups milk (I used non-fat)
  • 1 14-ounce can cheddar cheese soup
  • 2 cups grated sharp cheddar cheese (not pre-shredded)
  • 1 teaspoon dry mustard powder
  • 1 teaspoon powdered onion (not onion salt)
  • 1 tablespoon olive oil or melted butter
  • 2 tablespoons panko bread crumbs
Instructions
  1. Preheat your oven to 425 degrees F.
  2. Bring a large pot of water to boil over high heat. Add 2 teaspoons of table salt and then stir in the elbow macaroni. Stir frequently so that the pasta doesn't clump together. Cook for 5 minutes.
  3. Drain the pasta, reserving 1 cup of the pasta water. Set the pasta water aside.
  4. Add the pasta back into the pot; stir in the diced canned tomatoes and then cover and set the pot aside for 5 minutes. Note--the pan is no longer on the heat. After your 5-minute wait, the pasta should be al dente. Set aside.
  5. Add the flour to a large saucepan or saute pan. I used a large oven-safe saute pan so that I could create the sauce and bake the macaroni in the same pot (saving a dish is never a bad thing). Heat over medium until melted; stir in the flour and cook for 2 minutes, stirring constantly. You want the flour to cook but not brown.
  6. Stir in the milk all at once; stir constantly with a wire whisk until the mixture thickens and is smooth. Add the soup and seasonings. 
  7. If you have used a large, oven-safe saute pan simply fold the cooked elbow macaroni into the sauce. If you used a saucepan, pour your cheese sauce over the cooked macaroni and then spread in a greased oven-safe casserole dish.
  8. Combine the olive oil and bread crumbs and sprinkle over the macaroni.
  9. Bake the casserole for 18-20 minutes or until bubbling around the edges. Let sit for 10 minutes before serving.


Saturday, October 31, 2020

Jack-O-Peppers

Isn't he cute?

Today is Halloween—in our circle of friends, we focus more on the Reformation than on ghosts and goblins, but it's still fun to carve pumpkins and dress up in silly costumes. This year I'm showing up as a mom who doesn't get enough sleep. (I'll bet that's most of you too!).

This morning my older daughter said she wanted to prepare a Halloween-themed meal for dinner. She tossed out a few ideas (make spaghetti and pretend that the pasta is worms and the sauce is blood), but that REALLY didn't sound like something I'd want on my table. But we like stuffed peppers, so I suggested that perhaps we could carve faces in orange bell peppers, and so the idea of "Jack-O-Peppers" was born.


Carb Diva's Jack-O-Peppers (makes 4)

Ingredients
  • 1/2 cup orzo (rice-shaped pasta)
  • 1/2 pound sweet Italian turkey sausage
  • 1 cup jarred marinara sauce
  • 4 orange bell peppers
  • grated Parmesan cheese (for garnish)

Instructions
  1. Preheat oven to 350 degrees F.
  2. Cook the orzo according to package directions. Drain, rinse, and set aside. 
  3. Cook the turkey sausage over medium heat in a large saute pan, breaking it up as it cooks, until crumbled and no more pink remains—about 10 minutes. Stir in the cooked orzo and marinara sauce.
  4. If you want to go with the Halloween theme, carve "jack-o-lantern" faces in your orange peppers. Next gently cut and remove the tops and shake out the seeds. Stuff the peppers with the sausage/orzo mixture.
  5. Place the stuffed peppers in a baking dish. Pour water into the dish to about 1/2 inch up the sides of the peppers. Place the peppers in the preheated oven and bake for about 1 hour. Garnish the top of each pepper with parmesan cheese.

Saturday, October 3, 2020

Pumpkin Risotto


Today the sky is gray and dreary and I'm in need of some comfort food. There's a package of Aidell's chicken/apple sausages in the freezer. I'll saute those with some Granny Smith apples from a friend's orchard. That's a good start, but I need something more--something toothsome and creamy.

I bought a sugar pumpkin a few days ago at the produce stand, there is a sack of arborio rice in the pantry, and I still have some fresh sage in the garden. So, all I need is about 45 minutes at the stove and we can have a wonderful dinner of sausages, apples, and risotto.

Risotto is a rice dish common in the northern region of Italy. The type of rice used is very important. Don't run to your cupboard and grab the box of Minute Rice, or even Uncle Ben's. It won't work. You need a short-grain arborio rice. Arborio rice has a higher starch content and remains firm (al dente) when cooked--that is exactly what you want and need for a proper risotto. Risotto is creamy, but not mushy. The grains remain gently "toothy" but are enveloped in a creamy cloak which results from the mixing of the starch with the liquids in which the rice simmers.

Pumpkin Risotto (serves 6)

Ingredients
  • 1 small sugar pumpkin (or any other hard winter squash such as acorn), about 1.5 lbs
  • 6 cups chicken stock or vegetable broth, brought to a simmer
  • 1 tablespoon unsalted butter
  • 1 tablespoon olive oil
  • 1 medium onion, diced (about 1/2 cup)
  • 1 clove garlic, minced
  • 1 1/2 cups arborio rice
  • 1/2 cup white wine (not too dry—a Riesling is nice)
  • 1 teaspoon finely shredded fresh sage
  • 4 tablespoons grated Parmesan cheese
  • 1/4 cup Gorgonzola (or other bleu cheese of your liking, optional)

Instructions
  1. To begin, cut the pumpkin in half, scoop out the seeds and then peel. Cut the flesh into small (about 1/2-inch) dice. Saute the pumpkin in the butter on low heat until it begins to caramelize and softens. (You want it to "give" when pierced with a knife--think texture--done but still slightly firm,  not soft and squishy). Remove the pumpkin to a bowl and set aside.
  2. In a large saucepan saute the onion over medium heat in the 1 tablespoon of olive oil. Cook, stirring occasionally until it begins to brown, about 10 minutes. Add the minced garlic and the rice; stir until the rice is coated with oil.
  3. Add the white wine and then about 1 cup of the stock, stir and let simmer over medium-low heat until almost all of the liquid is absorbed. Repeat this process, ladling in stock, stirring, and simmering until all the stock is used and the rice is cooked through. This will take about 20 minutes.
  4. Stir in the pumpkin and then the parmesan and fresh sage. Stir until the cheese is blended in and the mixture appears creamy. If desired, crumble a bit of Gorgonzola on top of each serving.

Photo courtesy https://cookieandkate.com/roasted-butternut-squash-risotto/


Saturday, August 22, 2020

All Day Cassoulet


My dad was a very frugal shopper; he loved finding a bargain and could calculate the unit cost of an item in his head long before any of us could have produced the answer with a calculator (if we had had pocket calculators back then). He died before the advent of warehouse clubs, so I've taken his place, scouring the aisles for the best deals in town.

I don't feel like shopping today--I don't need to. I know I already have enough stored in my pantry to last through just about anything (even a pandemic). Let's see, there are 20 pounds of chicken tenders in the freezer, 10 pounds of onions, a dozen cans of diced tomatoes, several pounds of chicken sausage, and an untold amount of dry beans. Mmmm sounds like cassoulet.

Cassoulet is a rich, slow-cooked bean stew or casserole originating in the south of France, containing meat and white beans. The dish is named after its traditional cooking vessel, the cassole, a deep, round,  earthenware pot.
Cassoulet (Photo courtesy CreativeCommons)

All Day Cassoulet

Ingredients
  • 2 cups Great Northern or dried navy beans (see Note below)
  • cheesecloth
  • 1 bay leaf
  • 1 sprig rosemary
  • 3 sprigs of fresh thyme
  • 2 whole cloves
  • 1 medium onion
  • 1 celery stalk
  • 1 medium carrot
  • 1 tablespoon olive oil
  • 1 1/2 pounds chicken tenders
  • 1 1/2 pounds chicken sausage (I like Aidell's), sliced
  • 2 large onions, diced
  • 2 cloves garlic, sliced thin
  • 1 14-ounce can of diced tomatoes
  • 1 cup of dry white wine
  • 4 cups coarsely torn fresh bread (preferably from a crusty, rustic loaf)
  • 4 tablespoons unsalted butter, melted

NOTE: There are two ways to prepare dried beans. The first, and the one you are probably most familiar with, is to sort them (there COULD be rocks hiding in there), place them in a pot, cover them with water and let soak overnight. I don't know about you, but I don't often (ever?) plan that far ahead. If cooking beans means that I need to prepare the night before, cooked beans will not happen in my house. There's another method—an easier method, and it works just as well. Sort the beans, place them in a cooking pot (with a lid) and cover them with water. You want the water to go about 2 inches over the top of the beans. Bring to a full boil over high heat and boil for one minute. Turn off the heat, put on the lid, and let them sit for one hour. No peaking! OK, now you're ready to proceed with the rest of the recipe.

Instructions

First, prepare the beans:
  1. Cut a square of cheesecloth, about 6-8 inches. Place the bay leaf, rosemary, and thyme in the middle of the square and tie them up with string/kitchen twine. You want the herbs to flavor the beans, but you don't want them (especially the rosemary leaves) to get lost in the broth. This little bundle is referred to as a bouquet garni (yes, it's French!). 
  2. Push the cloves into the onion; place the onion, celery stalk, and carrot in the pot. Add enough cold water to cover to about one inch above. Bring to a boil. Reduce heat, and simmer gently until beans are tender throughout but not falling apart, 40 to 50 minutes. Discard the onion, celery, carrot, and bouquet garni. Set the beans aside—DON'T drain!

Next, the meats and vegetables:

  1. While the beans are simmering prepare the meats. Heat one tablespoon of oil in a large saute pan over medium heat. Cook the chicken tenders for about 5 minutes, or until browned on all sides. Don't overcrowd the pan or the chicken will steam and not brown. It's best to cook in small batches. Remove the browned chicken pieces to a plate and set aside.
  2. To the same pan add the sausage and cook for about 5 minutes or just until it begins to brown and caramelize. Remove to the same plate as the chicken.
  3. Now add the diced onion to the pan and cook, stirring occasionally, until the onion becomes translucent and begins to color. Toss in the garlic slices and cook for an additional minute. Add the wine and bring to a boil, scraping up any browned bits on the bottom of the pan with a wooden spoon.

Now, get ready to assemble the casserole:

  1. Preheat oven to 300 degrees F.
  2. Using a skimmer, remove half of the beans from their pot and place in the bottom of a dutch oven. The next layer is one-half of the tomatoes.
  3. Next, the chicken, sausage, and onions followed by the remaining tomatoes and the remaining beans. Add enough cooking liquid so the beans are almost, but not quite, submerged. Reserve the remaining liquid.
  4. Bake s-l-o-w-l-y:
  5. Transfer pot to oven and cook, uncovered, for 2 hours. Check the liquid every 30 minutes to make sure it is no more than 1/2 inch below the beans, and add liquid or water as necessary. Do not stir.
  6. After the cassoulet has cooked for 2 hours, toss bread and butter in a bowl. Sprinkle over cassoulet, and return to oven until beans are tender and bread is golden 1 to 1 1/2 hours.
  7.  Before serving, let the cassoulet stand at room temperature for 20 minutes to cool and allow the beans to absorb some of the liquid.

Wednesday, March 11, 2020

Comfort Food - Easy Chicken and Gravy


If you're anything like me, when the weather is cold and dreary or when disappointment knocks on your door, you seek comfort. 

Sometimes that comfort comes in the form of a good book and warm slippers by a cozy fireplace. Perhaps the beauty of music soothes your soul. For others, writing or painting are a welcome escape from woes and worries.


And sometimes, we need something rich and satisfying to comfort us inside as well as out. That's when a recipe like this one comes to the rescue.


The card on which this recipe is written is worn and stained (it's been called upon a lot). I'm not even sure where the original recipe comes from—perhaps the back label of a can of evaporated milk. I will be the first to caution that this is not diet food—sodium and fat levels are probably way off-scale, but there are some days that I simply DON'T CARE! 


This is one of those days, and I'm going to make my baked chicken, which makes its own amazing gravy right in the baking pan.


Baked Chicken and Gravy

Ingredients
  • 3 to 3 1/2 pounds chicken thighs, bone-in
  • 1/4 cup flour
  • 1/4 cup melted butter
  • 1/4 cup sliced mushrooms
  • 1 large yellow onion, diced
  • 2/3 cup evaporated milk
  • 1 can (10.5 ounces) cream of mushroom soup
  • 1 cup grated American cheese (not imitation)
  • 1/8 teaspoon black pepper
Instructions
  1. Preheat oven to 425 degrees F.
  2. Coat the chicken with flour, shaking off excess. 
  3. Drizzle melted butter into a 13x9-inch baking pan; arrange the chicken in the pan in a single layer.
  4. Bake, uncovered, for 30 minutes.
  5. Turn chicken pieces over, and bake 15 to 20 minutes more or until tender and browned. Remove from the oven.
  6. Reduce heat to 325 degrees F. 
  7. Pour off excess fat from the pan.
  8. Stir together mushrooms, onions, milk, soup, and cheese. Pour over the chicken. 
  9. Cover with foil; bake for 15 to 20 minutes. Serve over mashed potatoes, rice, or noodles.

Saturday, February 29, 2020

St. Patrick's Day Cottage Pie


My Irish Heritage


Next week we leap to the month of  March, and in just 16 days everyone will be "a little bit Irish".

I'm more than a "bit" Irish (and one glimpse at my reddish-blonde hair, green eyes, and leprechaun-like stature will attest to that!)
My paternal grandmother, Elizabeth Guiney, was born in 1875 to English-Irish parents. At the age of 16, she became a member of the Salvation Army; she was an officer before the age of 20 and one of the first missionaries to travel to Canada.
I am in awe of Elizabeth's dedication to pursuing what she believed in, her passion to do what was needed, and the courage she displayed in moving away from friends and family at such a young age. Unfortunately, I never really knew her. She died when I was just 6 months old. If not for her determination, she would not have journeyed to this continentshe would not have met the man who would become my grandfather, and I would not exist.
I love my grandmother, and in March, I dedicate my thoughts and my cooking to her memory.
"Mary had a little lamb...and peas and
carrots and potatoes and called it shepherd pie." --Carb Diva

What (you might ask) is Shepherd's pie? Shepherd's pie is, simply put, leftovers—reinvented with a bit of necessity and a healthy measure of frugality.
The English tradition of meat pies dates back to the Middle Ages. Game and mutton pies were popular and served in pastry "coffyns." They were cooked for hours in a slow oven and topped with rich aspic jelly and other sweet spices. The eating of "hote [meat] pies" is mentioned in Piers Plowman, an English poem written in the 14th Century.
One key ingredient that separates shepherd's pie from the Middle Ages "hot coffyn" is the use of potatoes. Potatoes are a new world food and were first introduced to Europe in 1520 by the Spanish. Shepherd's Pie, a dish of minced meat topped with mashed potatoes, was probably invented sometime in the 18th Century by frugal peasant housewives looking for creative ways to serve leftover meat to their families.
Sunday dinner centered around a roast. On Monday, you ate roast again, but cold this time. Tuesday the leftovers were chopped/minced finely and reinvented as "pie". (And after that, dinners for the remainder of the week went decidedly downhill).
Shepherd's pie was so named because the meat used was lamb (or probably mutton). However, today many cooks make it with beef.
Remove the lamb and your Shepherd's Pie becomes Cottage Pie.

St. Patrick's Day Cottage Pie
Ingredients
  • 4 cups leftover mashed potatoes
  • 1/2 cup milk
  • 2 tablespoons unsalted butter
  • 2 tablespoons olive oil
  • 4 cups ground beef or turkey*
  • 1 cup carrot, chopped
  • 1 cup sliced celery
  • 2 tablespoons flour
  • 2 cups beef or chicken stock
  • 1/2 cup frozen peas
  • 2 cups mushrooms, sliced
Instructions
  1. Heat oven to 400 F. In a saucepan, gently heat mashed potatoes and milk, stirring occasionally, until well combined. Remove from heat and stir in butter. Set aside.
  2. Heat olive oil in a large skillet over medium-high heat. Add ground meat and cook, breaking up with a spoon, until browned, 5 to 7 minutes. (If using leftover meatloaf, you don't need to cook and brown for 5-7 minutes. Just a minute or two to heat is sufficient).
  3. Add carrot and celery and cook for 5 minutes. Sprinkle in flour, stir, then add chicken broth. Simmer for 3 minutes and remove from heat. Add peas and mushrooms. Spoon into an oven-proof casserole and top with the mashed potatoes. Bake until the top is golden, about 40 minutes.
  4. *In place of ground meat you can substitute 4 cups of chopped leftover roast or meatloaf

My  daughter and I are obsessed with watching   Master Chef Australia . This reality TV series, based on the original British MasterChef beg...